Tooled Leather Solo Seats – What You Need To Know
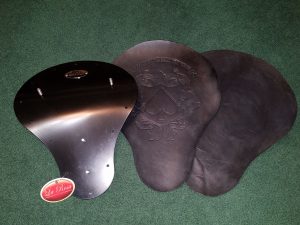
When considering adding a custom made leather seat to your motorcycle project, there are certain key words you may want to familiarize yourself with. The way in which it is crafted directly affects the lifespan and quality of that seat. As well, materials are key to an overall beautiful valuable leather seat. It is not only the quality of the work that appears on the leather and lace itself; underneath and within that seat are both extremely relevant in its overall crafting in order to preserve that craftsmanship.
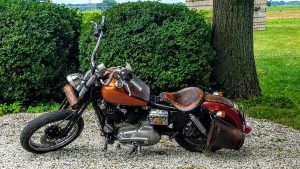
An “early ’84” Harley Davidson Sportster Ironhead XLH customized with handcrafted tooled leather by CC Custom Leatherworks. This custom bike features a tool bag on the springer front end, fuel tank cover, a solo seat by La Rosa Design, two swing arm bags, and a rear fender pillion-pad cover.
There are three components to a solo seat that are worth becoming familiar with if you are not intending to craft the seat yourself. In today’s market there is fierce competition and online sources galore such as Youtube videos about who all make these seats. By knowing what key words to look for when you read a description about a potential seat you are interested in, you can have an expectation as to how long it will last, not to mention what is exactly meant by quality. The three components I pay attention to consist of the seat pan itself, the foam padding inside and finally the leather covering on the outside.
The seat pan, which refers to the hard metal seat minus the cover and/or cushion, come in a variety of metals or other hardened materials and shapes. Ideally, if it is metal, you want it NOT to remain bare, but protected by a layer of paint to offset any potential rust or chemical breakdown. You will want to consider one that rises towards the back, as you will quickly realize what gravity can do as you sit accelerating, slowing down or bouncing up and down according to the conditions of that particular road! And, as well, there is style preference to consider – the ol’ skool style for example may include the larger seats of the older, heavier cruisers, or the smaller ones often found on show-bike choppers… The choices are alive and well online and limited only by the time the buyer takes to find them. Hardened steel, traditionally, is my favorite. You will expect to find four studs or bolts coming out the bottom. Towards the front it is common to find two lined up, front to back, that may fasten to a narrow slide piece of metal that then fastens to the frame towards the front. They may be two about 6 inches apart, side to side, which commonly holds two springs or a solid metal plate from which a solo shock absorber may attach to. There are a variety of arrangements but know that you can either purchase a bare bones solo seat pan unpainted that will needed to be welded or holed for which to add them later, or will come ready to be attached to your frame.
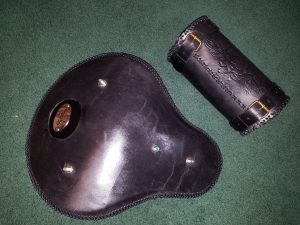
The foam padding is relevant in the prevention of moisture, mold and mildew. Key words to look for or to ask the craftsman about are “closed cell” foam, and/or neoprene. Neoprene is a highly resistant rubber-based product that is among the best materials suited for this job. It is often used in industrial applications because of its resistance to solvents as well as mold and mildew.
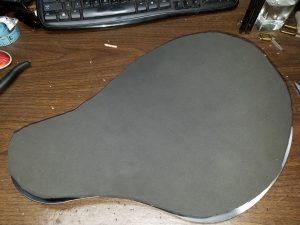
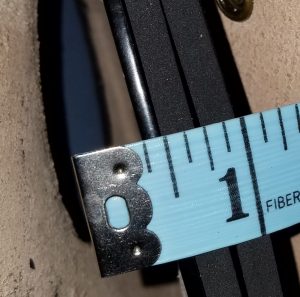
Closed-cell foam means the surface area is made up of individually closed tiny “bubble-like” cells. This is what keeps out unwanted solvents, as well as moisture, and mildew during times where your bike may be exposed to rain or wet weather. In applying cushioning to a seat pan, they are typically of the 1/4″ to 3/8″ thickness, to as much as a 1/2″ or more.
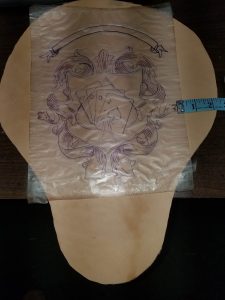
As for the leather, there are many types available; from cowhide to alligator. All have their individual thicknesses. Cowhide may be used, and (when used for solo seats) is commonly the 6-8 oz. range of thickness and referred to as vegetable-tanned tooling leather. Keep in mind, there may be other hides that may use a significantly lower number of oz. simply because of its durability under similar circumstances. Key words are the number of oz. or thickness of the leather. All leather is measured in oz. of thickness. They are always referred to as a range since leather thickness will vary from lot to lot due to composition of the particular piece. Thus, the typical cowhide for most custom seats are in this range of 6-8 oz.
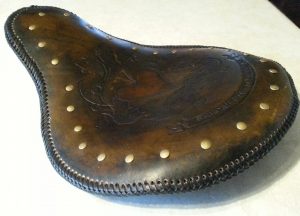
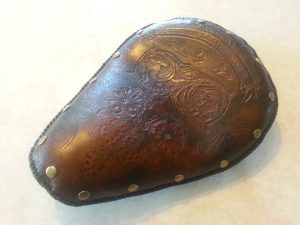
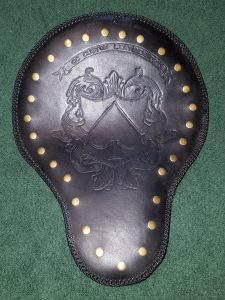
Armed with this rudimentary knowledge you will be informed and confident enough to ask the potential craftsman relevant questions as to the quality of the piece they represent if it isn’t already mentioned in their descriptions or demonstrations on video. You can, further, be assured of a quality product you are giving your hard-earned money for that goes far beyond how well it may appear in a picture. It translates to a highly loved and admired product that can last a lifetime!
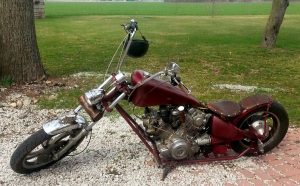
’81 Yamaha Virago xv750 motor in a custom-built hardtail frame, featuring a custom leather tool bag, solo seat and pillion-pad cover, along with leather grip on the handshifter.
Copyright © CC Custom Leatherworks

The seat pan should not be painted. The paint, & glue can react chemically, and create a non-adherent mess. The seat pan will not rust if covered with glue, then covered with leather….top and bottom. Other than that …good job on your thesis.
Great point to be made; especially with the variety of foam types out there to be used as padding- In the particular description I show, I actually did not opt to use glue with the thin padding and the way in which I stitched the top and bottom piece, and it’s worked out fine for the past 2-4 years for the two solo seats I use on my bikes. I also did not want to “possibly” compromise the integrity of the neoprene closed cell padding structure were glue to be used on it… If you order a La Rosa Design seat pan, they come with a black finish that, perhaps, is powder-coated anyway… Nevertheless, I would totally agree, where one uses a rust-preventative, automotive spray paint, especially, your point is well-made! Lots of variables to consider, but safety and “tried and true methods throughout any process when it comes to bike building should never be compromised. Thanks for your comment!